Angular 17: New devtools injector tree view

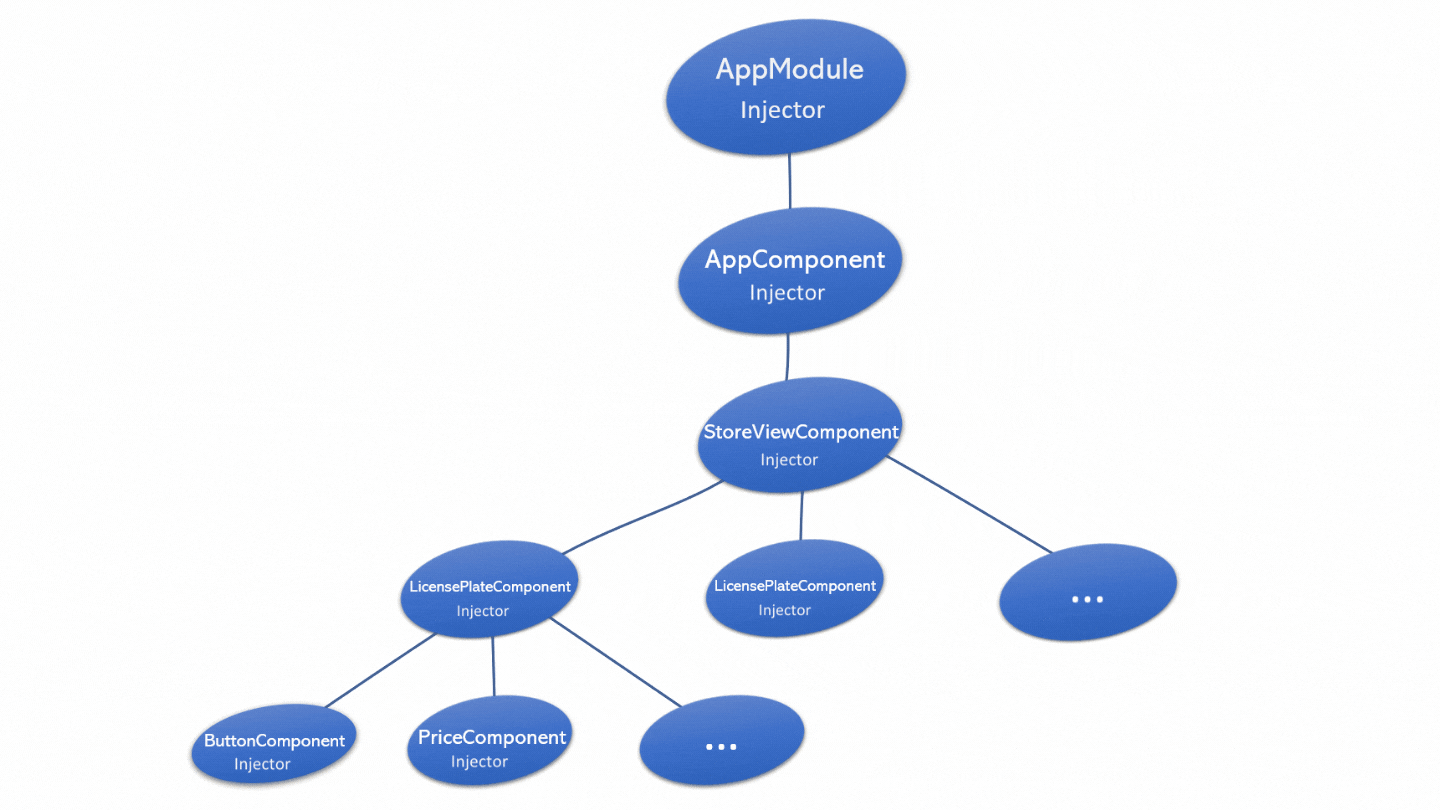
Another Angular 17 update is the release of a new DevTools panel called Injector Tree. It’s a good option to visualize both your element hierarchy and injector hierarchy, and it is accessible as a third tab in the Angular DevTools browser extension available for Chrome, Firefox, and Edge:

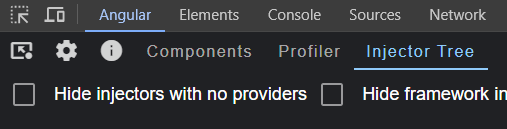
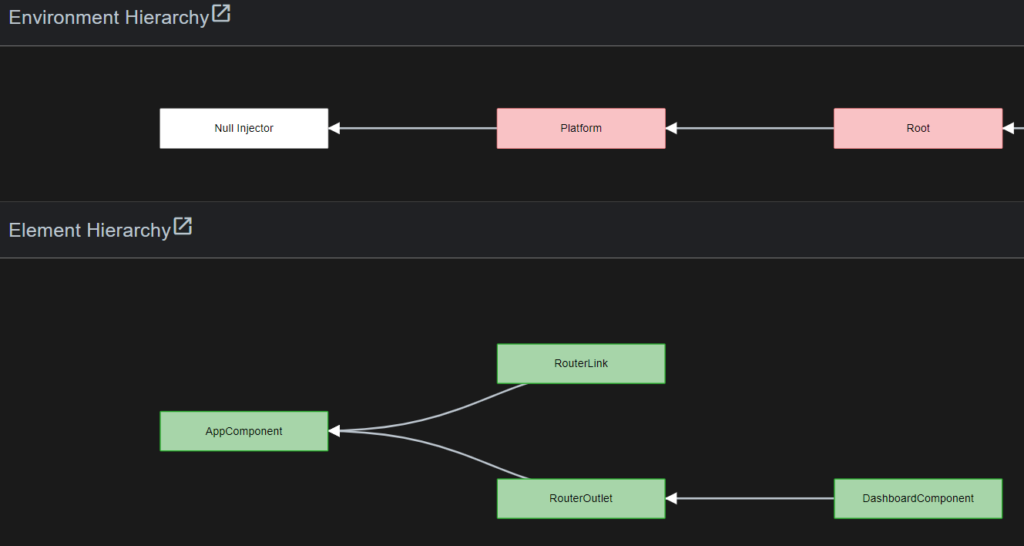
When we click on that tab, a tree view of all hierarchies shows up on the screen:

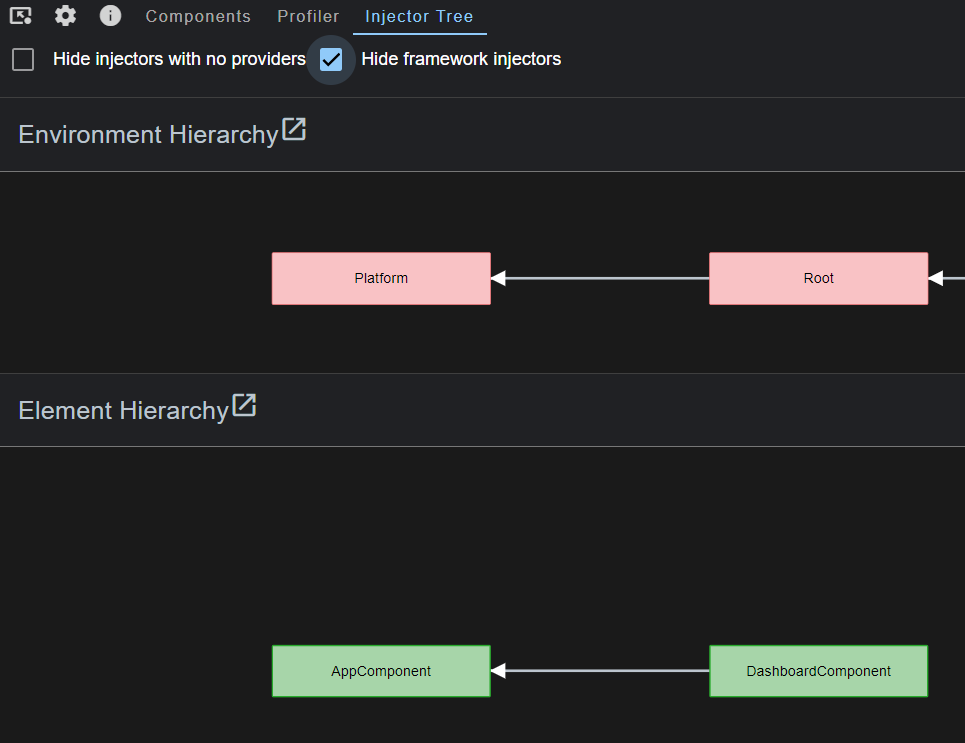
For a clearer view, we can check the option “hide framework injectors” to focus on our code:

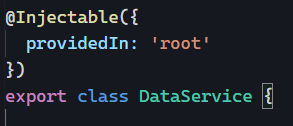
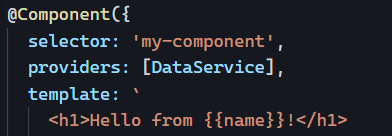
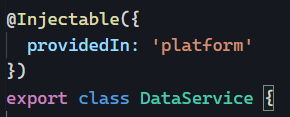
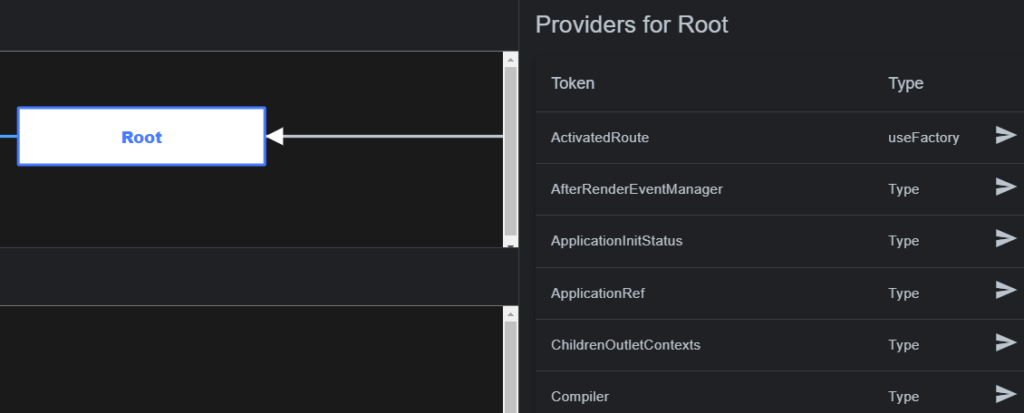
Clicking on an injector (such as root) shows the list of all injectables/services available in that injector:

This new tab seems to be just getting started, and more information will be added later. Even though the Devtools is a browser extension, the Injector tree tab only works for apps using Angular v17+. I tried an Angular v16 app with no success.

Dependency Injection: ElementRef

We use dependency injection daily to inject services in our Angular “objects,” such as components, directives, pipes, and other services.

Angular does offer other kinds of injectables, though, and one of those is the ElementRef. Its primary purpose is to give us direct access to the native DOM element of a component or a directive.

Here’s a code example (you can test it in Stackblitz here):

The above code changes the background color of the HTML element to red. It’s important to note that the above implementation is not ideal. We should use Angular data bindings for such a use case, which are a lot more readable (code example in Stackblitz here):

The Angular team doesn’t recommend using this API either:

So when should we use ElementRef? Just like markForCheck, it’s a last resort option, and we should use it when everything else fails. The only use case I would consider for ElementRef is when I have to interact with a non-Angular 3rd-party library, such as a chart or a map library, after carefully checking that Angular wrappers are not available on npm (or such wrappers do not pass my tests for good, reliable dependencies)

How to run code in an injection context?

Yesterday, I introduced an injection context, and we saw a few locations where we could inject dependencies. This can be limiting in scenarios where we call a method that creates and returns an Observable outside of an injection context, as we can’t always initialize observables in a constructor. Does that mean we cannot use the takeUntilDestroyed operator in those scenarios?

No, because we can store our injector for later use using the following approach:

The key is to use the runInInjectionContext function and pass the injector as a parameter.

For the takeUntilDestroyed operator, we can inject a DestroyRef in our injection context and then use it as a parameter whenever we need that operator:

Problem solved! We can use all these tools from the framework in any place we want, thanks to EnvironmentInjector and DestroyRef.

What’s an injection context?

In the past few months, the introduction of the inject() function and the takeUntilDestroyed operator shared something important: While these features are based on functions, these functions have to run within an Angular injection context, or you’ll get errors from the framework.

That’s because Angular relies on dependency injection for almost everything. As a result, it’s helpful to know what is an injection context.

The most apparent injection contexts are these:

  • Constructor of an “Angular class” such as services, components, directives, pipes, etc.
  • In the initializer for fields of such classes.

Here is an example of what is and isn’t an injection context:

Other places are injection contexts:

  • In the factory function specified for useFactory of a Provider or an @Injectable.
  • In the factory function specified for an InjectionToken.
  • Within a stack frame that is run in an injection context.

In other words, this is when you’re configuring a module or dependency injection. The most common examples are related to the router – guards, resolvers, and such are all in the injection context, so we can inject dependencies there:

The inject() function

Next in our dependency injection series is the inject() function. You’re probably familiar with injecting services using class constructors as follows:

We can also use the inject function to do the same:

The inject function can be used in 3 different places. We can use it when initializing the field of an “Angular” class (component/service/pipe/directive/module) or in the body of the constructor of such a class:

Or it can be used in a provider factory function (see yesterday’s post as an example):

For now, we can consider that function as a syntax alternative. That said, we must start using it as soon as possible because router class guards have been deprecated in Angular 15.2. And the alternative is functional guards that might need dependencies injected – using the inject function:

Conditional Dependency Injection

Yesterday, we saw how to use our component (and module) hierarchy to configure dependency injection with Angular.

Today, let’s look at how we can make dependency injection conditional. For instance, say we have a LoginService for production that requires features unavailable at dev time or that we do not want to use during the development phase.

What we can do then is configure our providers to make a decision based on the current environment:

Using the ternary operator [if true] ? [then this] : [else that], we can decide when to use a service over an alternative version.

If you need to make that dependency injection decision depending on other factors, such as data from other services, or if you have several different possible services to inject, you can use a factory function that relies on other services (deps) that are injected in the factory function as follows:

The order of the dependencies in deps has to match the order of the parameters in the factory function passed to useFactory.

Dependency Injection Priority and Hierarchy

Yesterday, we covered the different options to configure our providers with the providedIn syntax. Today, let’s look at how Angular resolves dependency injection using hierarchical injectors.

Let’s assume we have a ButtonComponent that needs a LoginService. Angular is going to check the injector of ButtonComponent to see if a LoginService is available there (since all components have their own injector, configurable with the array of providers or the providedIn syntax).

Suppose the component injector doesn’t know about that service. In that case, it’s going to ask its parent component, then grandparent, making its way up the component hierarchy till it gets to the root injector of the application:

These are called hierarchical injectors: They rely on our component hierarchy. This explains why changing the providers’ config at the component level impacts a component and all its children.

What about modules?

If a service cannot be found in the component tree, then Angular is going to use a similar resolution path using the module hierarchy, from the child modules all the way up to the AppModule.

If no service is found, then Angular throws an error stating no provider is available for that service.

Dependency Injection and Provider Config

As Angular developers, we use and create services fairly often. So, in today’s post, let’s demystify the following syntax and see what the different options for it are:

When a service is provided in the root injector (providedIn: 'root'), it means that such a service can be injected into any component of your application, and that service will be a singleton shared by all consumers in your application.

If we want to restrict the scope of a service, we can provide it in a module or a component instead of the root injector. The syntax looks like this – we use the class name of the targeted module or component:

When a service is provided in a module, only the components/directives/pipes/services of that module can inject that service. However, when provided in a component, that component and its children can inject that service.

From a syntax standpoint, it’s also important to mention that using providedIn is equivalent to doing the following in a component or a module:

The above code is equivalent to the following:

So you only need one or the other; both would be redundant.

Finally, there is another option available: platform.

The service would be injectable into any Angular app in the current browser tab. It’s a rare use case, but if you’re running multiple Angular applications on the same page and want to share a service between these applications, platform is what you need.

For more information, you can read that post of mine that covers all these options (note: providedIn: 'any' used to be an option but is now deprecated, which is why I didn’t mention it)