I’m posting a few essential articles to revisit, updates to know about, and one question to ponder this week:
Three articles to revisit and associated updates with Angular 19
When we need to initialize an application with server data (environment variables, for instance), we can use Angular’s APP_INITIALIZER. For more information, revisit this tutorial about APP_INITIALIZER.
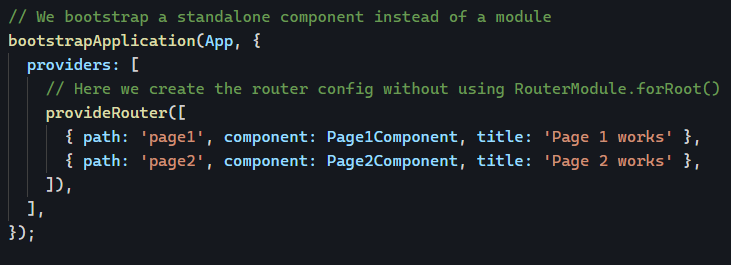
Angular 19 introduced a new syntax for this feature. This function must be called in the array of providers of your app bootstrap as follows:
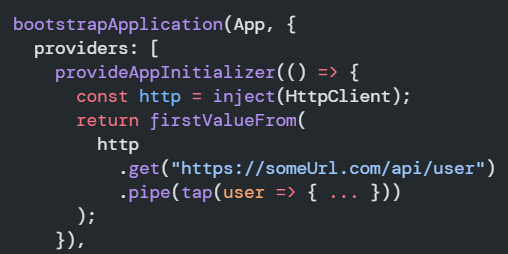
You can return an Observable or a Promise from your init function. The official documentation is here.
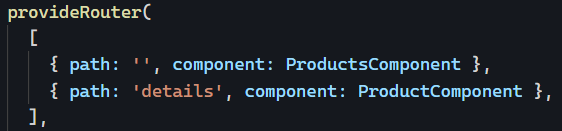
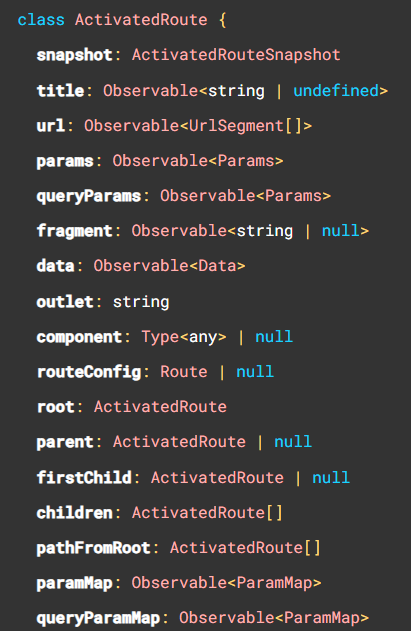
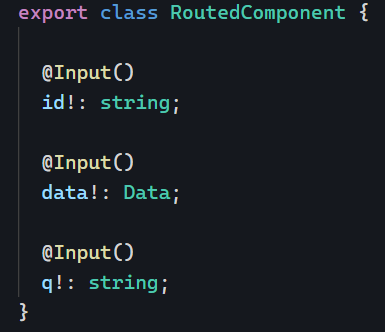
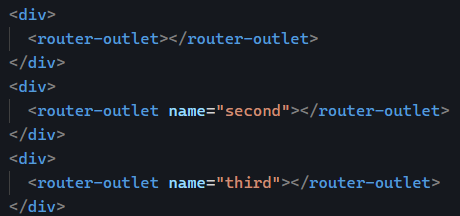
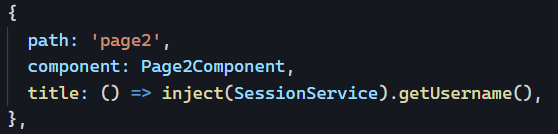
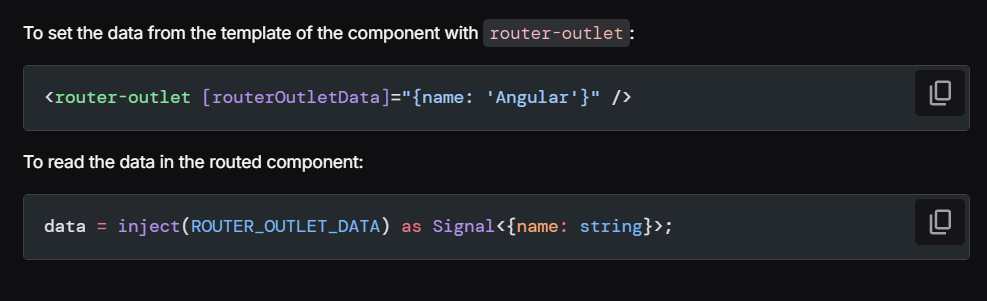
Another interesting feature expanded in recent versions is the ability to pass data to components using the router. I wrote about router state and how to use resolvers in the past, and even how to map router data to component inputs.
With Angular 19, we can pass data to a RouterOutlet to share information between parent and child components as follows:
One question to ponder this week:
How do you pass data to your routed components? Do you use any of the features described above or just inject services in the routed component? Is there anything you could improve in your architecture using these tools?