Pluralizing is as natural in human language as it is painful to handle programmatically. Let’s say we want to address the following scenarios in an app that displays the number of posts:
If we have zero, display “No post.”
If we have one, display “1 post.”
If we have more than one, say 5, display “5 posts.”
We could use a combination of ngIf / else scenarios to handle this, but it would get ugly quickly. The upcoming control flow API would help, but it’s not available yet.
Angular HTTP interceptors can intercept and modify HTTP requests and responses. They can be used for a variety of purposes, such as:
Logging the details of HTTP requests and responses, such as the URL, headers, and body. This can be helpful for debugging and troubleshooting.
Authentication: Authenticate requests before they are sent to the server by adding custom headers to the HTTP request.
Caching: Interceptors can be used to cache HTTP responses, improving performance.
Error handling: Handle errors that occur during HTTP requests. This can help provide feedback to the user when the connection with the server is lost.
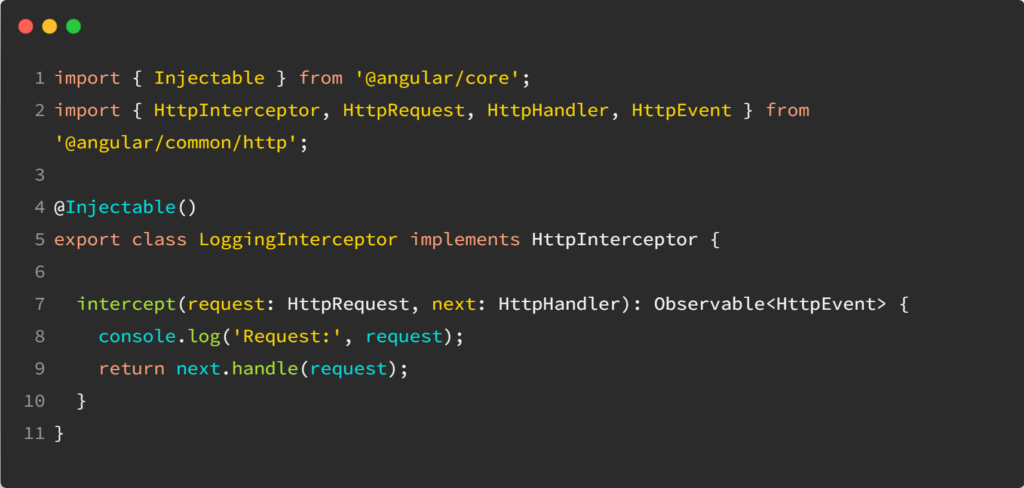
To create an Angular HTTP interceptor, you must create a class that implements the HttpInterceptor interface. The intercept() method of this interface is called whenever an HTTP request is made.
This method allows you to inspect and modify the request before sending it to the server.
Here is an example of an Angular HTTP interceptor that logs the details of HTTP requests:
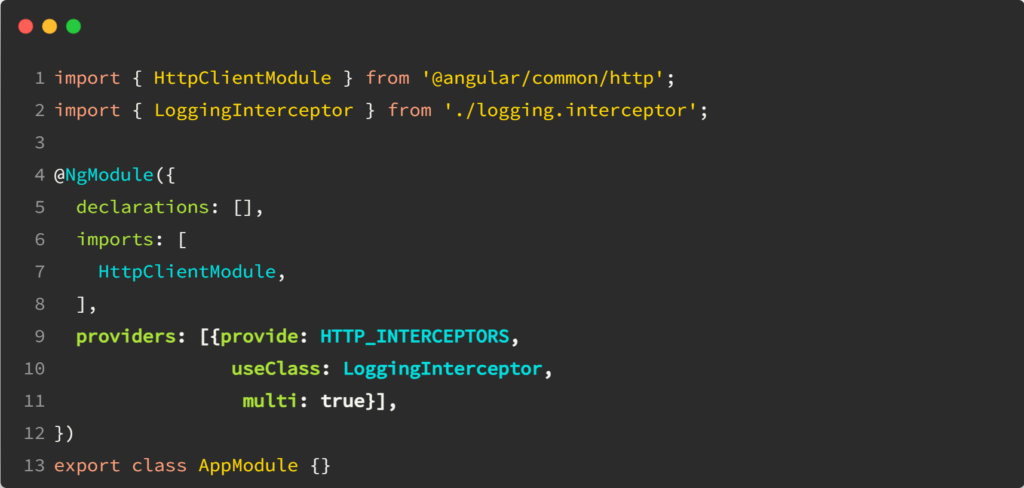
To use an Angular HTTP interceptor, you need to register it. You can do this by adding the interceptor to the providers array of your AppModule as follows:
Once you have registered an HTTP interceptor, it will be called whenever an HTTP request is made.
Today, I will cover how we can visualize and debug storage data. In Google Chrome, open the dev tools (right-click on the webpage, then “inspect” or press Ctrl + Shift + I).
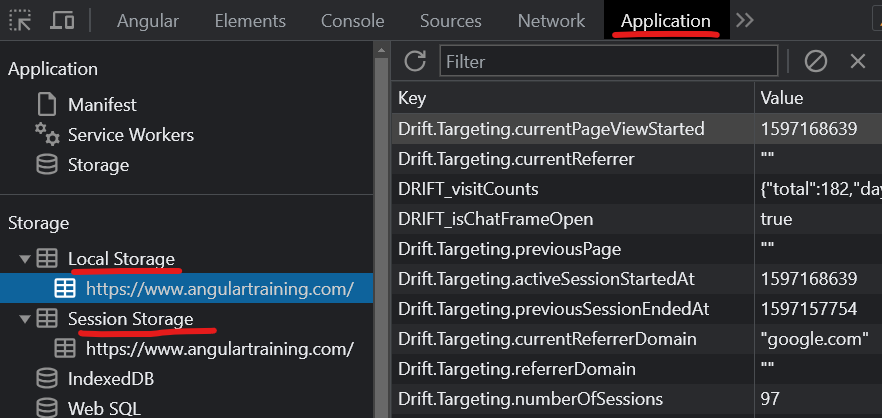
Once the dev tools panel shows up, click on the “Application” tab:
You can select Local Storage or Session Storage on the left-hand side. This shows you the contents of those storages on the right-hand side in key-value pairs. Storage is by domain, so using those tools on a different website would show you different data.
If an object is stored as a JSON string, you can click on the key-value row, and Chrome shows a collapsible version of that Javascript object at the bottom of the screen, making it easy to explore complex objects:
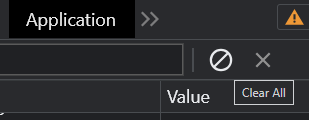
There are two buttons in the top right corner of that same panel. One allows you to clear the entire storage for the current domain, while the second one (the X) clears the currently selected key-value pair:
You can edit a key or value by double-clicking on the corresponding cell in the right panel’s table. This makes testing different values, resetting a cache, or debugging specific scenarios easy.
This is a guest post by Tomas Kotlar. Thanks for your contribution, Tomas! Remember than anyone can reach out to me to contribute or suggest post ideas.
ngClass, as defined by the Angular documentation, is a built-in attribute directive that dynamically modifies the behavior of other HTML elements.
Common use cases
Conditional Styling
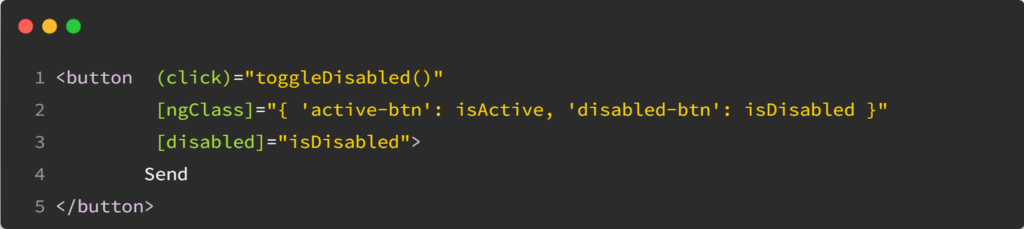
Let’s consider a button element that changes color based on whether it’s disabled or active. We can use ngClass to toggle between the ‘active-btn’ and ‘disabled-btn’ classes, giving the button a responsive touch:
Whenever the button is clicked, the toggleDisabled() function will be executed, toggling the value of isDisabled.
As a result, the button will become enabled or disabled based on the updated value of isDisabled, and the corresponding style (active or disabled) will be applied.
Using an Object
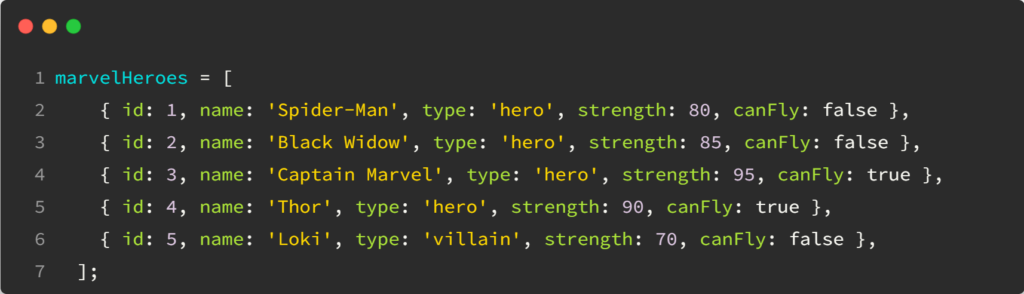
ngClass goes beyond just toggling classes. It also lets you iterate over object properties to apply your styles conditionally. This can be handy when working with data-driven apps or displaying dynamic content.
For example, using the following data:
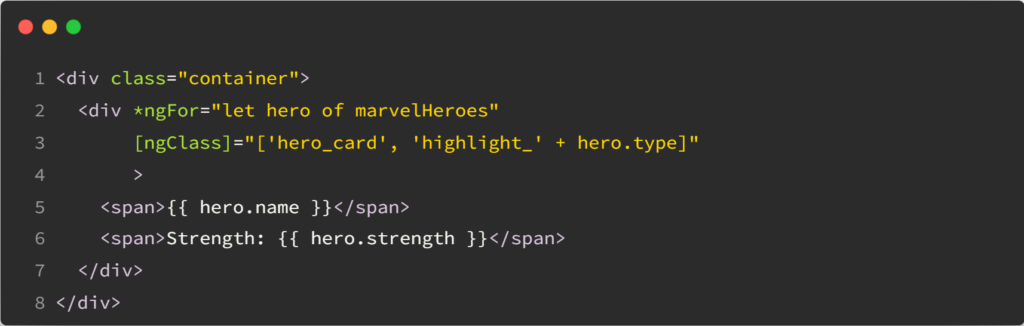
In our HTML, we can apply dynamic styles using an array:
Based on the type (‘hero’ or ‘villain’), the directive applies the appropriate highlight class to the hero card.
Combining classes using conditions
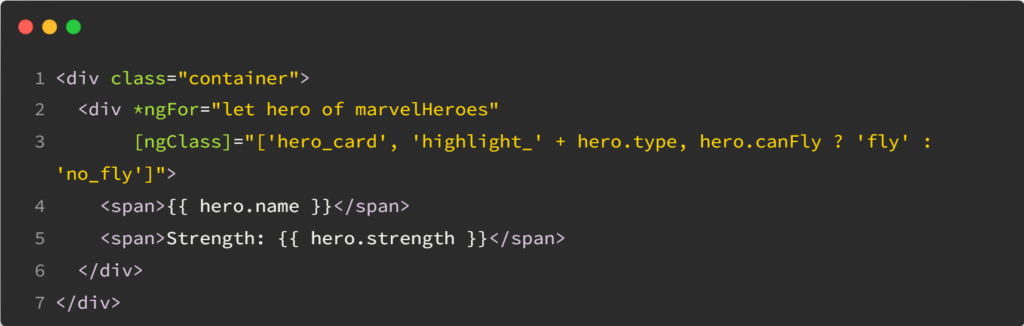
With ngClass, you can mix multiple CSS classes, toggling them individually or creating compound styles:
The hero cards will be highlighted for heroes who can fly and have a different style for heroes who cannot, based on the canFly property.
Here is an example of code I see way too often when people submit their code to our Angular certification exam:
While I could almost live with the above code, the following example makes me angry (especially because I tell people NOT to do that in bold uppercase characters in my instructions):
What’s the problem with that code? It uses any, and any is dangerous. It isn’t good because it turns off type safety. It makes your code less safe; it removes type information, it makes it less maintainable. It’s excruciating when we know that the HttpClient is nice enough to let us specify the type of the data we’re going to get as a response:
Of course, this type of information does not guarantee that the server is going to return data of that shape, so we have to make sure the server is indeed returning that exact type of data.
But the thing is, once you add that type to your HTTP request, you can (should I say, you must) do the following:
And this is important because when you subscribe to that Observable, Typescript knows what kind of data you receive:
And that is why we use Typescript. Using the above syntax enables autocomplete in your IDE; it brings type safety so you can’t make typos. There are only benefits to using it.
Yesterday, we covered ng-template and touched on different scenarios when it makes sense to use ng-template. Let’s now introduce a close relative of ng-template called ng-container.
There are a lot of similarities between those two elements, which can both be used to use structural directives such as ngIf or ngFor, with the bonus that ng-container can be used with the shorthand syntax of those directives:
One thing you probably noticed as an Angular developer is that we can’t use two structural directives on the same element:
In this scenario, using ng-container is the perfect way to use both directives without adding any HTML to the DOM, as ng-container, just like ng-template, doesn’t create new DOM elements:
Another use for ng-container is to become the host of a ng-template, similar to the way that a router-outlet is the host of routed components:
Such templates can be passed from a parent component using @Input and let the child component decide when to display which template, which is very powerful:
Yesterday, we saw that LocalStorage can be used as a persistent cache to store our data in the browser. Earlier, we covered that services are a cache of their own but have one instance per app/browser tab, which means that applications opened in multiple tabs can have an inconsistent state since they each have their own “singleton” services.
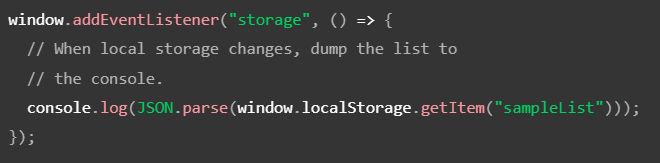
LocalStorage can be used to share data between multiple tabs that render the same application. Even better, there is a storage event that can be listened to to know when another tab updated LocalStorage:
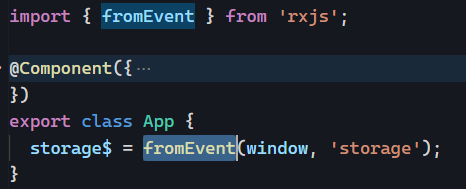
Using the Rxjs fromEvent function, we can turn the above event listener into an Observable:
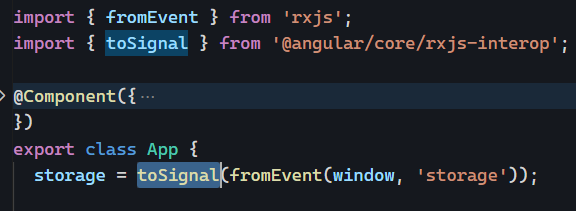
And if we’re using Angular 16+, we can turn the above Observable into a Signal with one more function:
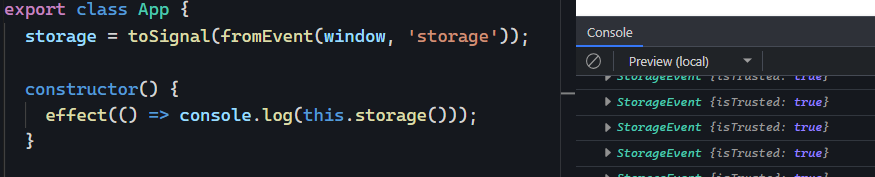
The above Signal could be used in a service to synchronize data between tabs. Spying on that Signal to see what’s going on in it is as easy as registering a side-effect on it using the effect function:
I mentioned that Angular apps are independent applications running in a browser tab and that closing such a tab “kills” the application and frees the memory used by our app – thus losing any data stored in our services. Using the browser’s refresh button would also clear everything – similar to a reboot of the application.
If we want a more persistent cache, we can use the localStorage API from Javascript. Learning that API takes five seconds:
The above code stores the string “Tom” in the browser localStorage under the key “myCat”. To read that value, later on, all we need is the following:
And that’s it! Such storage will remain in place if the user closes your app’s tab or even closes the browser and shuts down their computer. Your data stays in the browser storage if the user does not clear the browser’s cache.
Also, such data is stored based on the domain on your web app, so other websites cannot read your storage values, and you can’t access values from other websites either.
One last tip: To store objects or arrays in localStorage, we have to turn them into strings, which means we usually do the following:
And to read that object from localStorage:
Note that sessionStorage has the same API as localStorage, but follows different rules and has a shorter life span:
A page session lasts as long as the tab or the browser is open and survives over page reloads and restores.
Opening a page in a new tab or window creates a new session with the value of the top-level browsing context.
Opening multiple tabs/windows with the same URL creates sessionStorage for each tab/window.
Duplicating a tab copies the tab’s sessionStorage into the new tab.
Closing a tab/window ends the session and clears objects in sessionStorage.