Using the CDK ListBox for custom list selection

The Angular CDK is an important toolkit for building Angular applications. We’ve already covered how to display an overlay using the CDK. Today, let’s create a custom list selection feature using CDK ListBox.

Often, HTML dropdowns are too basic to allow for meaningful customization of what gets rendered in the dropdown. This has led to the creation of several custom components, such as Material Select.

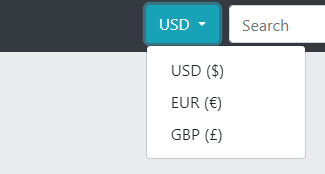
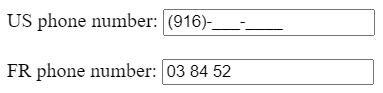
But what if you’re not using a library and still need to customize a list of items for your users? Something like this, for instance:

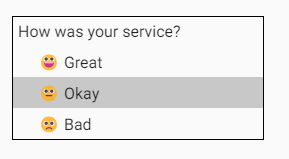
Implementing such a UI with HTML is not very difficult. The complexity of the task comes from getting all the expected behaviors for an accessible experience, such as keyboard interaction and focus management.

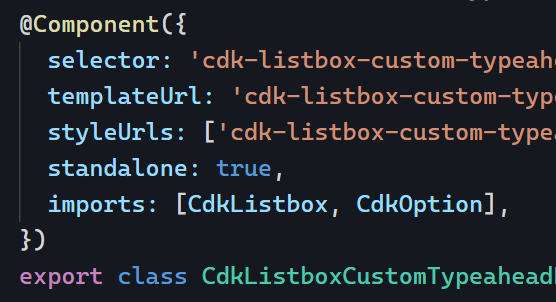
This is where the cdkListbox directive shines. Here’s an example:

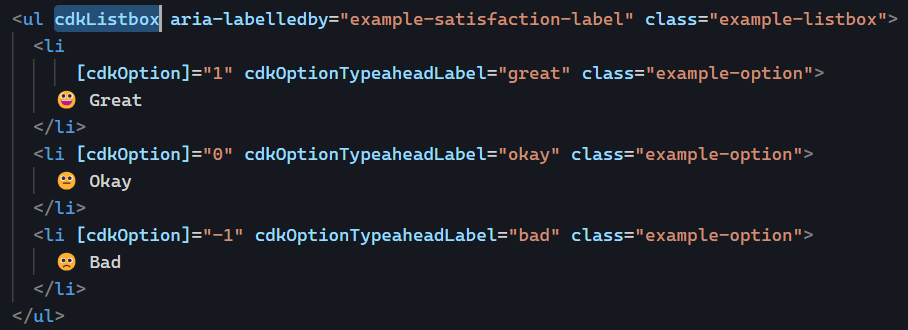
The few lines of code in this example add the following select-dropdown-like features to these basic HTML list items:

  • A numerical value is associated with the user selection (1, 0, or -1) thanks to cdkOption
  • Typeahead is available. If I click on the list and then type “o” on my keyboard, the “Okay” option gets selected.
  • The current selection can be changed using the keyboard’s up and down keys.

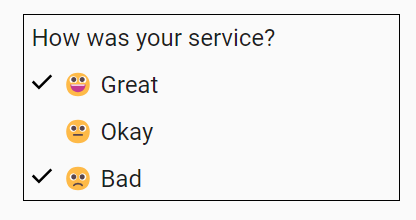
And there are many more possibilities to explore. For instance, enabling multiple selections in the list is as easy as adding a cdkListboxMultiple attribute on our list element:

And now I can do this:

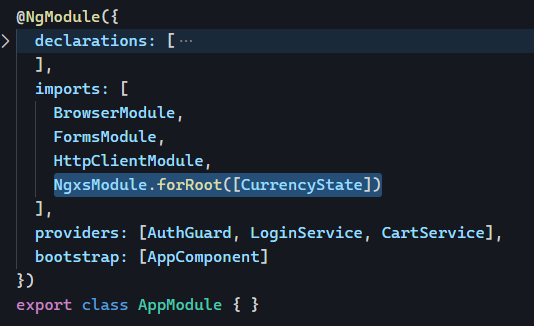
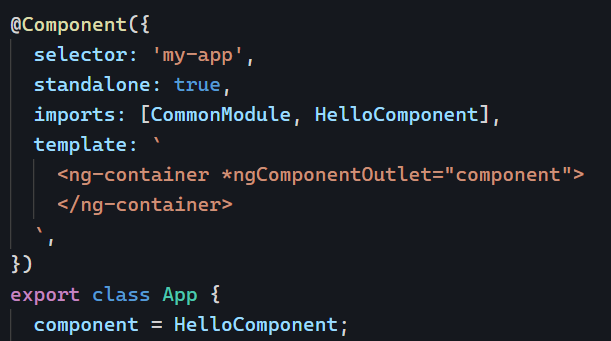
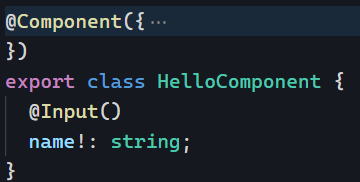
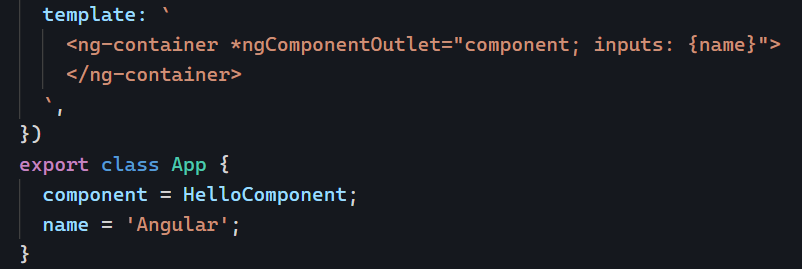
You can see that example in action on Stackblitz here. Another nice feature of the Angular CDK is that all its directives are standalone, so we can import just what we need in our components:

State Management: Action and Reducer

Now that we’ve covered what’s the global State and what’s the Store service, let’s take a look at how we can update that State. In our introduction to state management, we introduced Actions.

Actions are simple objects with a name/type describing what we’re trying to do. An optional payload contains the parameters for that Action. In our example of currency switcher, we want to change a currency, so we would create the following Action, where the payload is the new currency:

The above Action does absolutely nothing on its own. We need a reducer to implement the corresponding state transition. With NgXs, a reducer is a method with the decorator @Action in our State class:

In the above code, we define which method runs when the Action of type ChangeCurrency is dispatched to our state management library.

That method takes the current State, creates a copy of it (this is a core principle of Redux), and then changes the currency and exchangeRate in the new state object.

Then, NgXs will automatically notify any component/service/directive subscribed to that State that a new value has been set.

How to dispatch an action?

If we want to use the Action and Reducer created earlier, we use the only object that knows about everything in our state-management machinery: The Store.

Conveniently enough, our Store has a dispatch method that can be used for any Action:

As a reminder, the Store is a service that can be injected anywhere we need it:

We’ve covered most of the pieces of our state management architecture. We know how to create a State, an Action, a Reducer and use the Store to dispatch an action and update our State:

In our next post in this series, we’ll see how to Select and subscribe to specific parts of our State. You can see that example in action on Stackblitz.

5 useful pipes from ngx-pipes

ngx-pipes is a library with over 80 different pipes to choose from. Here is a list of 5 of my favorites:

timeAgo: An excellent alternative to Moment for duration formatting, which means turning a date/time into: “a few seconds ago” or “last week,” for instance.

ucFirst: Uses an uppercase letter for the first word in a sentence, unlike Angular’s uppercase pipe, which returns the entire string in uppercase.

filterBy: Filters an array of objects based on your criteria.

orderBy: The name says it all—orders items in an array based on a given property.

percentage: An excellent complement to the percent pipe. You can use the percentage pipe to compute the percentage value and then the percent pipe to format that value in any way you want.

You can find the complete list of pipes from ngx-pipes here. Note that those pipes are not standalone yet, but there’s a pull request to make that happen.

State Management: State and Store

After introducing state management concepts last week, let’s dive deeper and get into two essential concepts of state management libraries: Store and State. I’m using NgXs for these examples because the library’s syntax is the most straightforward and consistent with how Angular works, using Typescript decorators to configure the different classes.

The example we will be using is an online store where the user can change the currency and see the different prices get updated as a result:

We want to manage that currency and the exchange rate that goes with it using state management. The first step is to create a piece of State that handles that data – and provide a name and default value for it:

The above State has to be registered with the NgxsModule in our AppModule as follows:

And that’s it! Now, to interact with that State, we can use the Store service and inject it wherever we need it:

Of course, you can create multiple pieces of State for your application using the same approach as above. Every new part of our State gets added as a property to the global state object. For instance, our current currency information can be found at state.currencyInfo. If we add a new State with a name set to cartContents, its data would be accessible under state.cartContents.

In the next post of this series, we’ll see how to use Actions to update the application’s State. You can see that example in action on Stackblitz.

The Angular Accelerator is live!

I’ve been thinking for a long time about a way to bridge a gap in the training industry, which is mainly dominated by two options these days:

  • Corporate training or conference workshops: You attend a live session with a trainer for one or more days and touch on many topics quickly, but you can’t practice a lot with that new knowledge. It’s usually expensive and promotes quantity of instruction over quality.
  • Online courses: The scope of these courses is usually smaller and less in-depth, and the content doesn’t get adjusted to the audience. You can’t ask questions, you don’t practice, and since there is no time-blocking for these courses, it requires a lot of self-discipline to get the most out of them.

These thoughts gave birth to the Angular Accelerator. Over the course of a month (or more if you want to), you get challenged with 8 to 15 different exercises in an actual Angular application. Your expected involvement is around 30 minutes to 1 hour per day. You can get your code reviewed by myself and your peers and get access to solutions (both as a video walk-through and actual source code).

The Accelerator has several Slack channels where you can ask about anything and receive help. The Ultimate option also has weekly calls with me so you can ask questions and get live feedback.

Unlike video courses, you can get as much interactivity as you need and as much practice as you want!

Unlike live in-person classes, you or your employer won’t have to spend thousands of dollars!

Several people have already completed it, and the feedback has been exceptional so far:

“The quality of the course was exceptional, and the lessons went beyond what I had seen in other classes. I was able to learn advanced techniques I had yet to see before in a concise manner.”

“The Accelerator program has been truly engaging and enlightening, providing me with a wealth of knowledge and skills that I am eager to apply in my professional journey.”

If you’re interested or if you have any questions, let me know. My approach with the Accelerator is the same as what you can see in this newsletter: No BS, straight-to-the-point concise content that gets things done.

Also:

  • There is a 5-day free trial so that you can give it a try and cancel if you don’t like it (which has never happened so far)
  • The cost is adapted to the country where you live. A coupon code will appear at the top of the screen if you’re eligible for rebates applied at checkout.

We’ve had students from several continents and countries so far (France, Canada, USA, El Salvador, Uruguay, and more!), so feel free to join us and accelerate your Angular journey!

Introduction to State Management

When you work with Angular for quite some time, you realize that you implement similar services repeatedly. Most likely, you end up with services with BehaviorSubjects to store some data, and you have components that subscribe to these subjects exposed as read-only Observables.

If you’re not at that point yet, I suggest you stop reading this article and get into the above architecture pattern first. This is a good reading about what I call “progressive state management,” where you get into state management little by little. Start there.

Once comfortable with the above, you might start thinking about NgRx, NgXs, or other state management libraries.

Why state management?

The main goal of a state management library is to define a single way to handle data in your application. Instead of having your application data in multiple different services, all your data will belong in a single, massive object called state. That state has to follow several rules and cannot be updated directly.

State management is all about rules and conventions created by the ancestor of all state management libraries: Redux. All modern libraries use similar concepts and vocabulary.

Here are the three core principles of Redux:

  • Single source of truth: The app’s state is stored in a single object tree within a single store. In Angular applications, that store is usually a service that can be injected anywhere we want.
  • The state is read-only: The only way to change the state is to emit an action, an object describing what happened and how we want to change our state.
  • State changes are made with pure functions called reducers. These functions take the previous state, an action, and return the next state. They return new state objects instead of mutating the previous state.

Visually, a typical Redux application works like this: A user interaction triggers an action that updates the global state using a reducer, and then components receive state updates to render the new data:

I know what you’re thinking at that point: That’s a lot of definitions and vocabulary. But this is what all state management libraries give us, so there’s no way around it. For instance, here are the links to these concepts in 3 different state management libraries:

  • NgRx: State (notice how that class extends BehaviorSubject) – ActionReducer.
  • NgXs: StateActionReducer (note that NgXs does not mention reducers directly and tries to simplify how they work, which is one of the reasons why it’s my state management library of choice)
  • Redux: StateActionReducer

We’ll dive into these topics in more detail with a series of posts in the next few days/weeks.

What is the Ivy engine?

You’ve probably heard about the Ivy engine if you’ve been working with Angular for some time. Ivy is the code name of Angular’s current compilation and rendering pipeline.

Before Ivy, Angular used a two-step process: Building a project would compile all Typescript code to Javascript. Then HTML templates would get compiled at runtime in the browser, using a second compiler called the View Engine. This was done for performance reasons in the past, but the toolchain and the framework evolved for much better performance using the Ivy Engine.

View Engine was deprecated in version 9 and removed from the framework in version 13. Ivy is the only option now and results in:

  • Faster builds and smaller build output. Some applications became up to 80% smaller/quicker when they started using Ivy – mostly because the View Engine compiler doesn’t need to be shipped to the browser anymore, but also because of the improved tree shaking.
  • Faster runtime experience – The application loads faster since components no longer need to be compiled in the browser.

If you’re stuck with an older version of Angular, you can look at this guide on upgrading Angular. If the guide doesn’t work, 99% of the time, the problem comes from your dependencies, and following these best practices to pick your dependencies would help.

Use Lighthouse to improve your Angular applications

As Angular developers, we tend to focus on component architecture, modules, TypeScript, and the best framework use. Most of the time, those things differ from what matters to end users.

End users usually want:

  • Performance – 60% of the web’s traffic happens on smartphones that don’t always have fast internet connections.
  • Accessibility – Is your website accessible to everyone? Did you check if color-blind people could see it correctly? Do you use alternate labels for images and buttons for screen readers that read the content to a blind user?

And, of course, if your website is supposed to be discoverable on the web, there’s search engine optimization (SEO).

The best way to know how you’re doing in all these categories (and more) is to use a Google Chrome browser built-in feature called Lighthouse. It’s a tab available in the dev tools:

Navigate to your web app (a public URL is needed), open Lighthouse in the dev tools, and click the “Analyze page load” button. Note that you can also simulate a mobile device to get a different report. You’ll get a report with scores in all these categories:

Clicking on any of the scores gives you a TODO list of possible improvements. You can expand every item to get more information about what to fix, how to do it, and why it’s important:

The nice thing about Lighthouse is that once you have improved your app, it takes just a few seconds to test your website again and see your scores increase.

ngx-mask for user input masking

HTML forms are evolving but still lacking a little in masking, which really means “suggesting the proper format to the user.

For instance, if I need to capture a US phone number in a specific format, I’d like to use a mask that looks like this:

We could use a placeholder, but the placeholder disappears as soon as we start typing, whereas a mask should remain visible and try to make the user input fit into that format. For instance:

This is where ngx-mask helps. It’s a third-party library that passes my acceptance criteria for dependencies. ngx-mask comes with directives and pipes to implement customizable masks.

To install it: npm install ngx-mask

You can find out how to configure the library here. Here is an example of the mask directive used for a US phone number:

And another one for a French phone number that doesn’t show the mask as we type but still enforces it:

The result looks like this:

Here is a link to my example on Stackblitz.

You can try many different demos on this website. The library supports regular expressions and lots of other options, such as a validation attribute to invalidate the form when the input is invalid:

And it’s possible to have multiple different acceptable formats on a mask, too:

Angular 16.2: NgComponentOutlet input bindings

Another feature of Angular 16.2 is using input bindings with component outlets. You might not be familiar with ngComponentOutlet in the first place, so let’s explain what the directive does.

Let’s consider the following template syntax:

The above code would load a dynamic component into the ng-container. Assigning a new component type to componentTypeExpression would display it in that container. Here’s a basic example that shows a HelloComponent in the component outlet:

This can be helpful if you need to use different types of components and don’t want to (or can’t) use the router to make it happen.

The new feature of Angular 16.2 allows us to pass input values to that component. Let’s assume that HelloComponent looks like this:

We can bind a value to the name input as follows:

And that does the trick! You can see an example in action on Stackblitz here. inputs is an object that can have as many keys as needed. In my example, there is only one: name.