Yesterday, we covered ng-template and touched on different scenarios when it makes sense to use ng-template. Let’s now introduce a close relative of ng-template called ng-container.
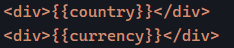
There are a lot of similarities between those two elements, which can both be used to use structural directives such as ngIf or ngFor, with the bonus that ng-container can be used with the shorthand syntax of those directives:

One thing you probably noticed as an Angular developer is that we can’t use two structural directives on the same element:

In this scenario, using ng-container is the perfect way to use both directives without adding any HTML to the DOM, as ng-container, just like ng-template, doesn’t create new DOM elements:

Another use for ng-container is to become the host of a ng-template, similar to the way that a router-outlet is the host of routed components:

Such templates can be passed from a parent component using @Input and let the child component decide when to display which template, which is very powerful:

You can find a complete code example of such a feature in this Stackblitz and a more in-depth tutorial here if you want to try it.