In a recent and surprising move, the Angular team decided to remove the file suffixes it had been using since Angular 2, such as: dashboard.component.ts or user.service.ts.
The rationale is that IDEs have become good enough to find what we need, no matter the file name. And that the new convention is closer to React and other TS-based frameworks/libraries. While that is true, clarity, conventions, and naming rules are what make Angular the technology of choice for many of us.
At every single event I attend and every single Q&A I participate in, the question always comes up: Why did the Angular team do that? Nobody asked for it! We hate it!
As a result, today, I’ll show you how to break the new rules. First, if you want to keep the legacy behavior with individual CLI commands, you can do: ng generate component Dashboard --type=component
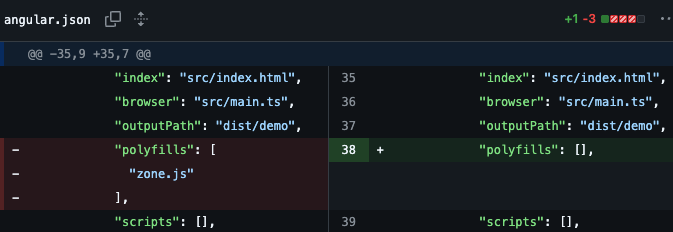
This will restore the “suffix” we grew accustomed to. If we want to make that change more permanent, we can edit angular.json and add the following schematics config:
"schematics": {
  "@schematics/angular:component": {
    "type": "component"
  },
  "@schematics/angular:service": {
    "type": "service"
  },
  "@schematics/angular:directive": {
    "type": "directive"
  }
}Code language: JavaScript (javascript)
Note that the above doesn’t list pipes, because pipes escaped the new renaming rules, to some extent: Instead of the old custom.pipe.ts, the new convention is custom-pipe.ts. I can live with that one, and the CLI doesn’t really allow overriding that behavior anyway.