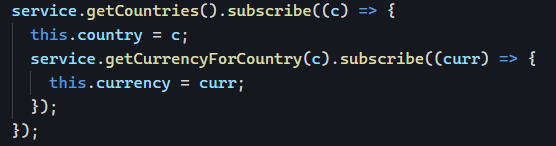
Welcome to this new series on Angular anti-patterns. I intend to cover one anti-pattern per week for a few weeks, starting with one of the most common ones: Subscribing to an Observable within another Observable subscription. Here’s an example where we get a country and then the currency for that country:
Why is this a bad idea? Here are a few reasons:
getCurrencyForCountry()is never unsubscribed, which can lead to memory leaks.- When the country changes, the Observable that gets the previous country’s currency is not canceled. If that Observable emits again,
this.currencywill get overwritten. - Such nested callbacks are hard to read, and as a result, such code is more challenging to maintain.
Let’s imagine our component template is as follows:
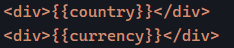
Then in a scenario where getCurrencyForCountry() emits updates values every second, our component would end up displaying the following values, which become wrong very quickly:

You can take a look at that code here.
The solution to avoid such issues is to use the switchMap operator as follows:

The above code works fine because switchMap cancels the previous currency Observable as soon as a new country is emitted from service.getCountries(). No more memory leaks, and our two Observables are always in sync:

Here is a link to that same code example using the switchMap operator.